Add your first comic
Drop in a CBR or CBZ file, choose how it is read aloud, and press play.
Updated
LiveComics reads comic files you own: CBZ and CBR archives. Adding one takes a minute of clicking, then a short wait while it is voiced. Do this on the website at livecomics.to on a computer. Once a comic is in your library, it also shows up in the iPhone and Android apps.
Step 1: Drop in the comic
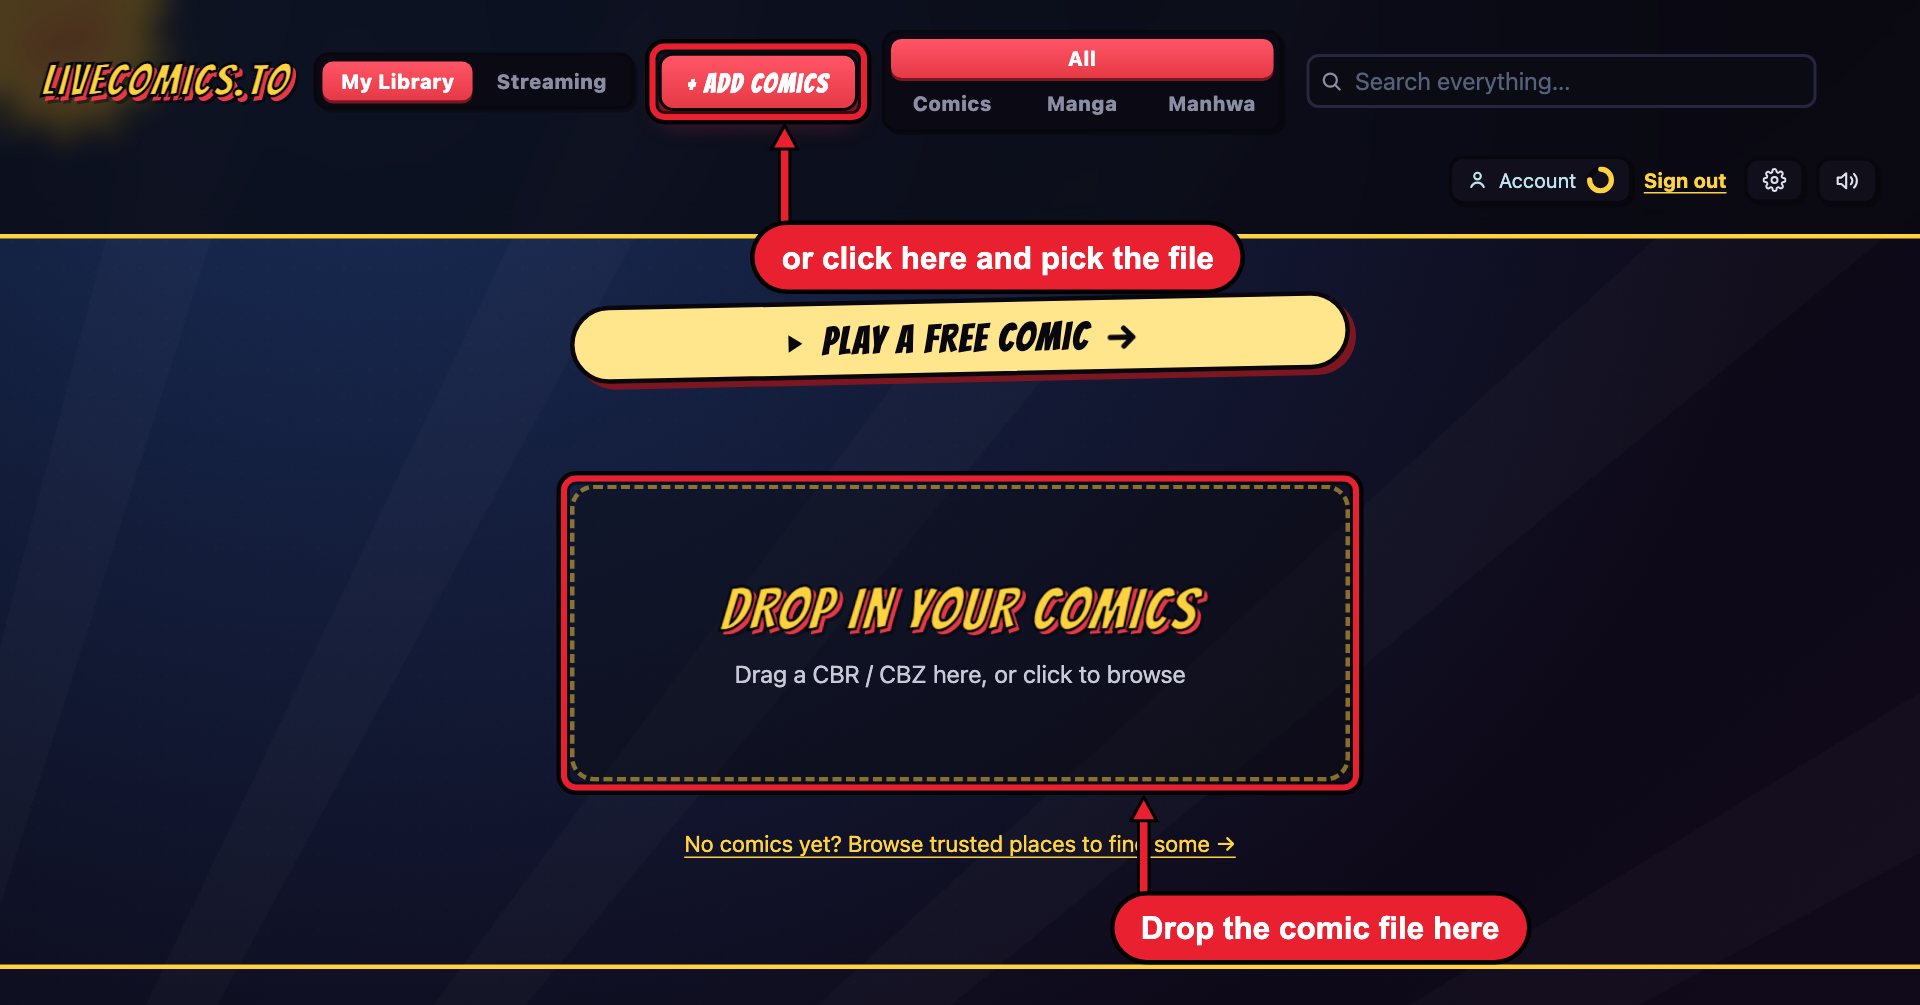
Sign in and open My Library. Drag your comic file onto the box that says Drop in your comics. Or click the box, or the red + Add Comics button at the top, and pick the file.
With a screen reader
- The box is a button named Drop in your Comics. Pressing it opens the file picker. The + Add Comics button does the same.
Step 2: Choose how it is read
A window called Add Comics opens. The choices that matter most:
- Import as. Voiced gives you the character voices, sound effects and soundscapes. Panel view is the guided panel-by-panel view with subtitles and no audio. Pages only stores the pages to read page by page, and costs no credits.
- Reading style. Emotion reads each line for the feeling the scene gives it. Even is a steadier, brisker read, with one accent held through the whole book.
- Accessibility. Tick Panel descriptions and a narrator describes each panel's artwork before its dialogue. It is made for blind and low-vision readers.
- Click Next.
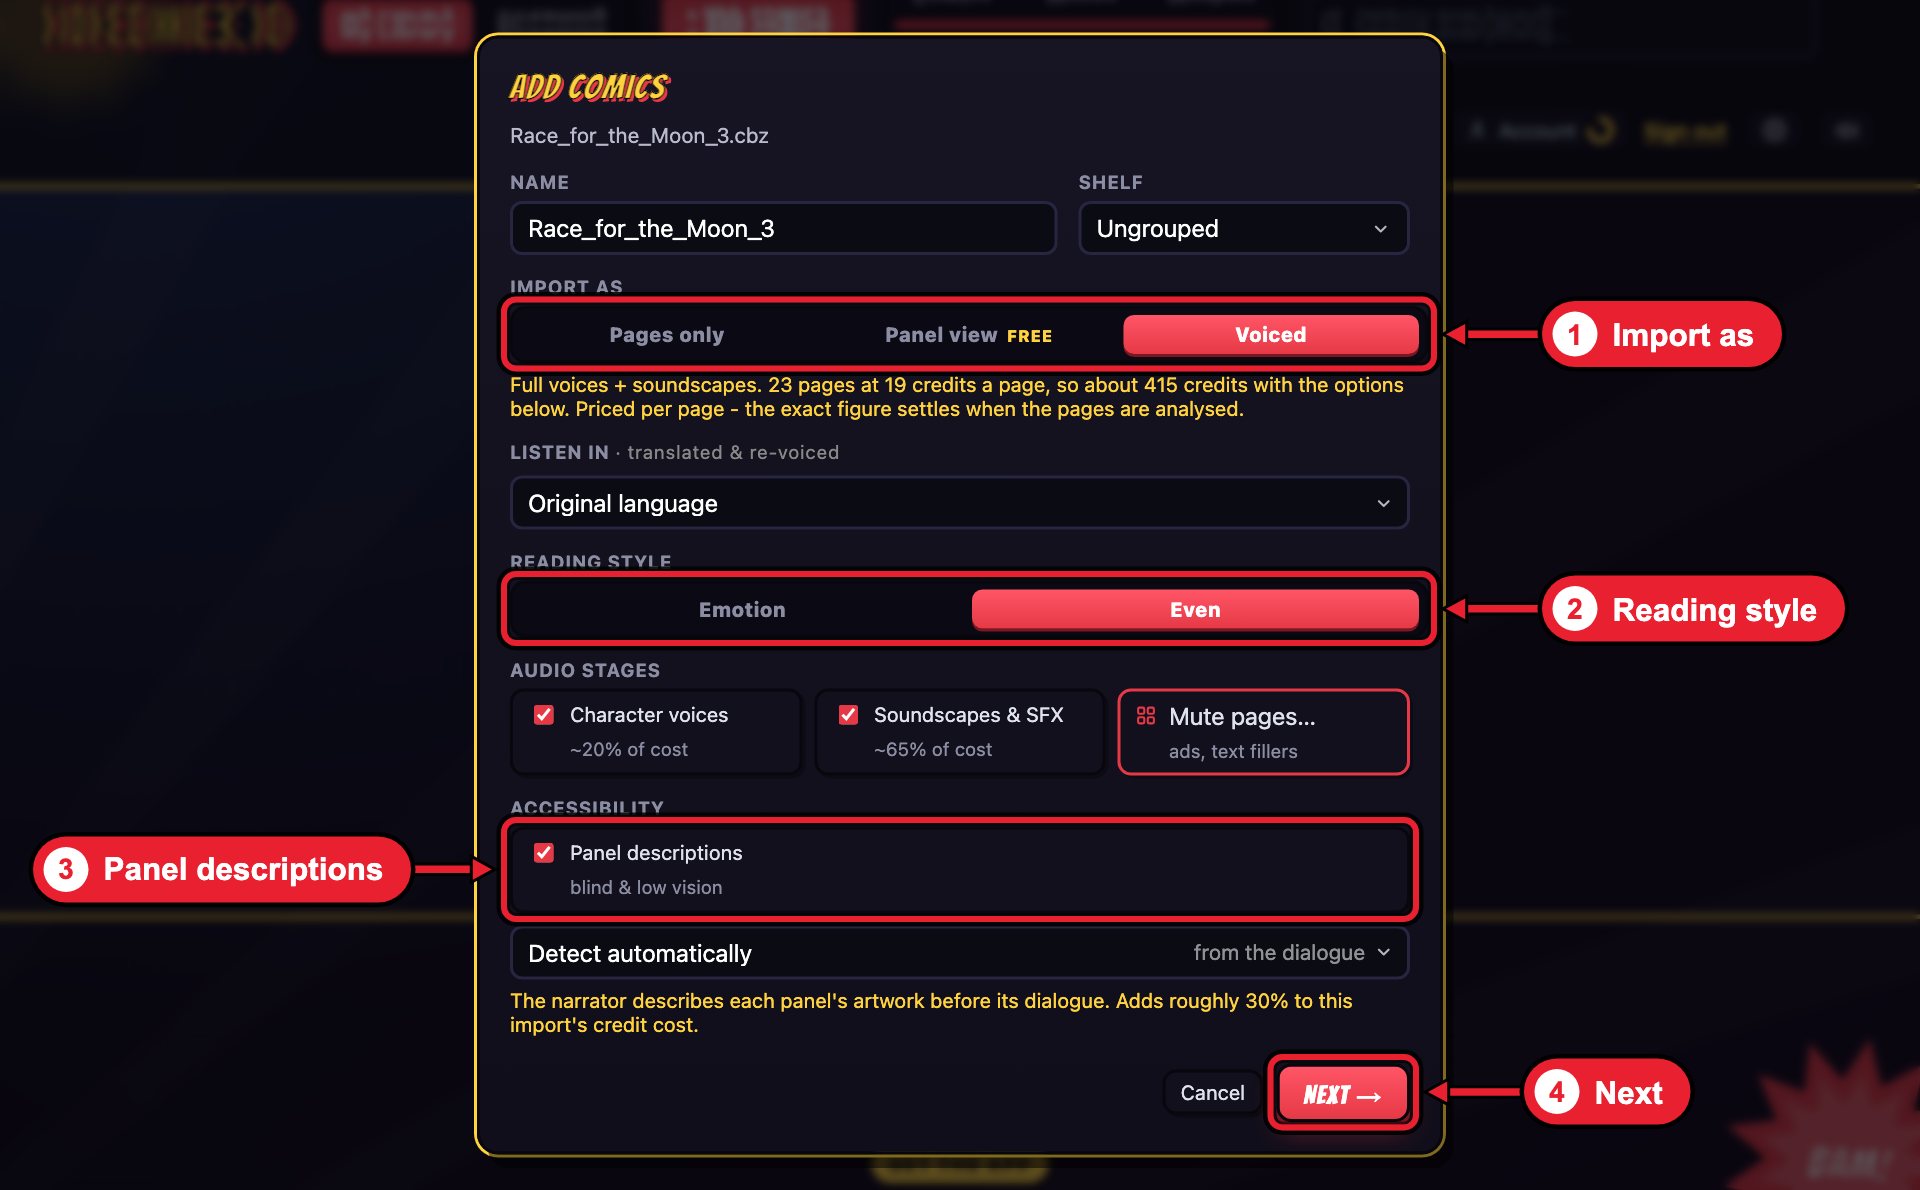
The yellow line under Import as shows the price in credits before you add anything, and it updates as you change the choices. If your balance is short, it says so right there.
With a screen reader
- Voiced, Emotion and Even are toggle buttons. The one that is picked is announced as pressed.
- Panel descriptions is a checkbox.
- The price line is announced again each time a choice changes it.
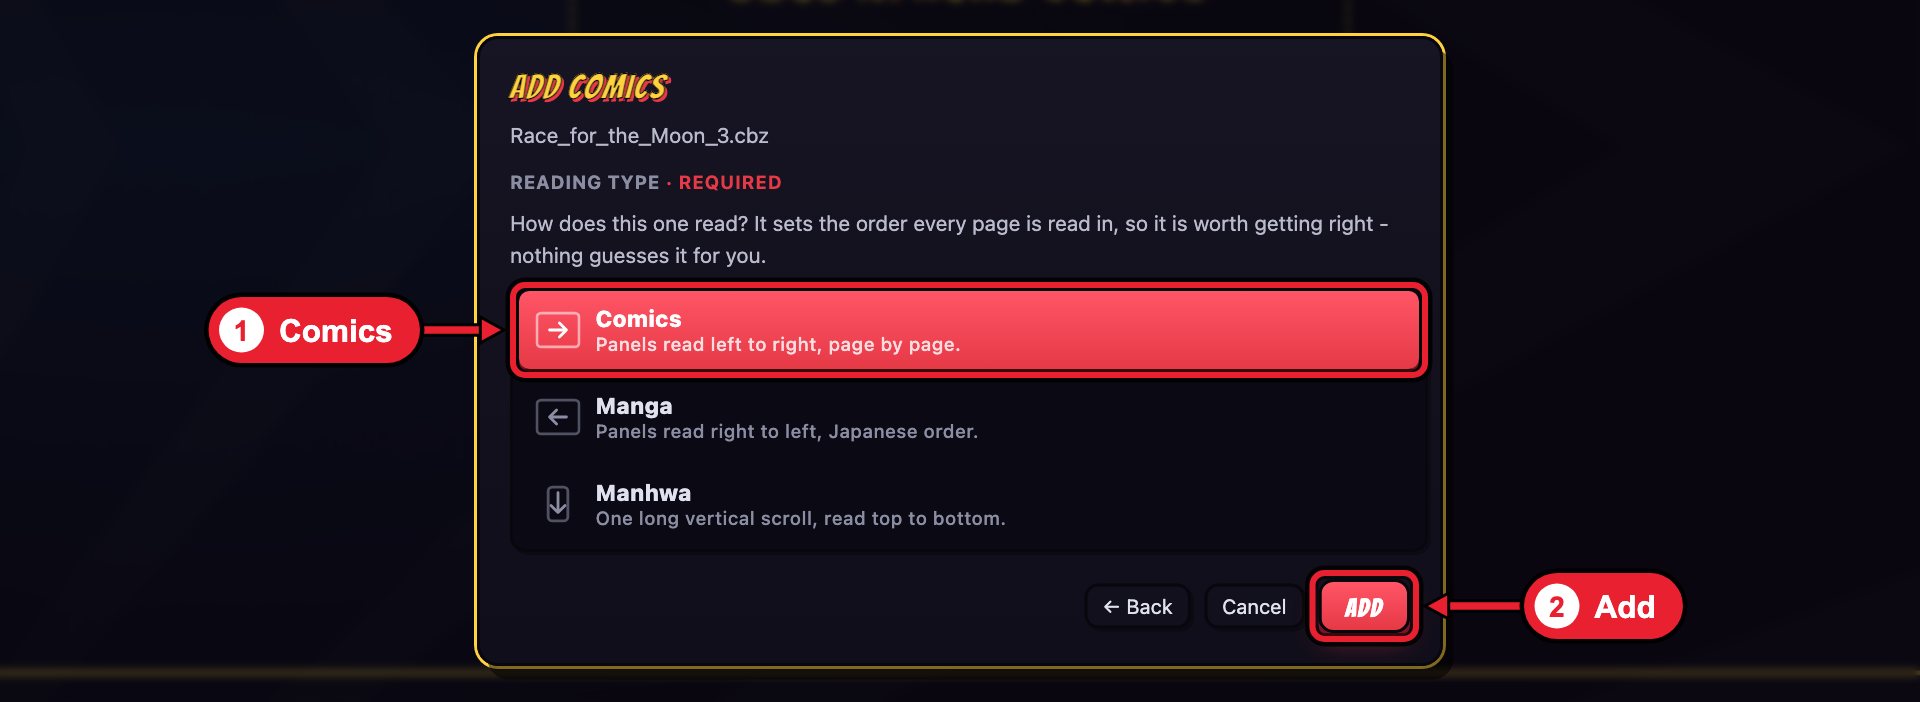
Step 3: Pick the reading type
Choose Comics for panels read left to right, Manga for right to left, or Manhwa for one long vertical scroll. Then click Add.
Step 4: Let it finish
The comic appears at the top of your library under Importing now, with a progress bar and the minutes left. The first pages are ready to read before the rest, and the rest fills in as it goes.
If you turned on panel descriptions, wait until the progress bar is gone before you press play. The descriptions are made after the voices, so starting early can skip them on the first panels.
Step 5: Press play
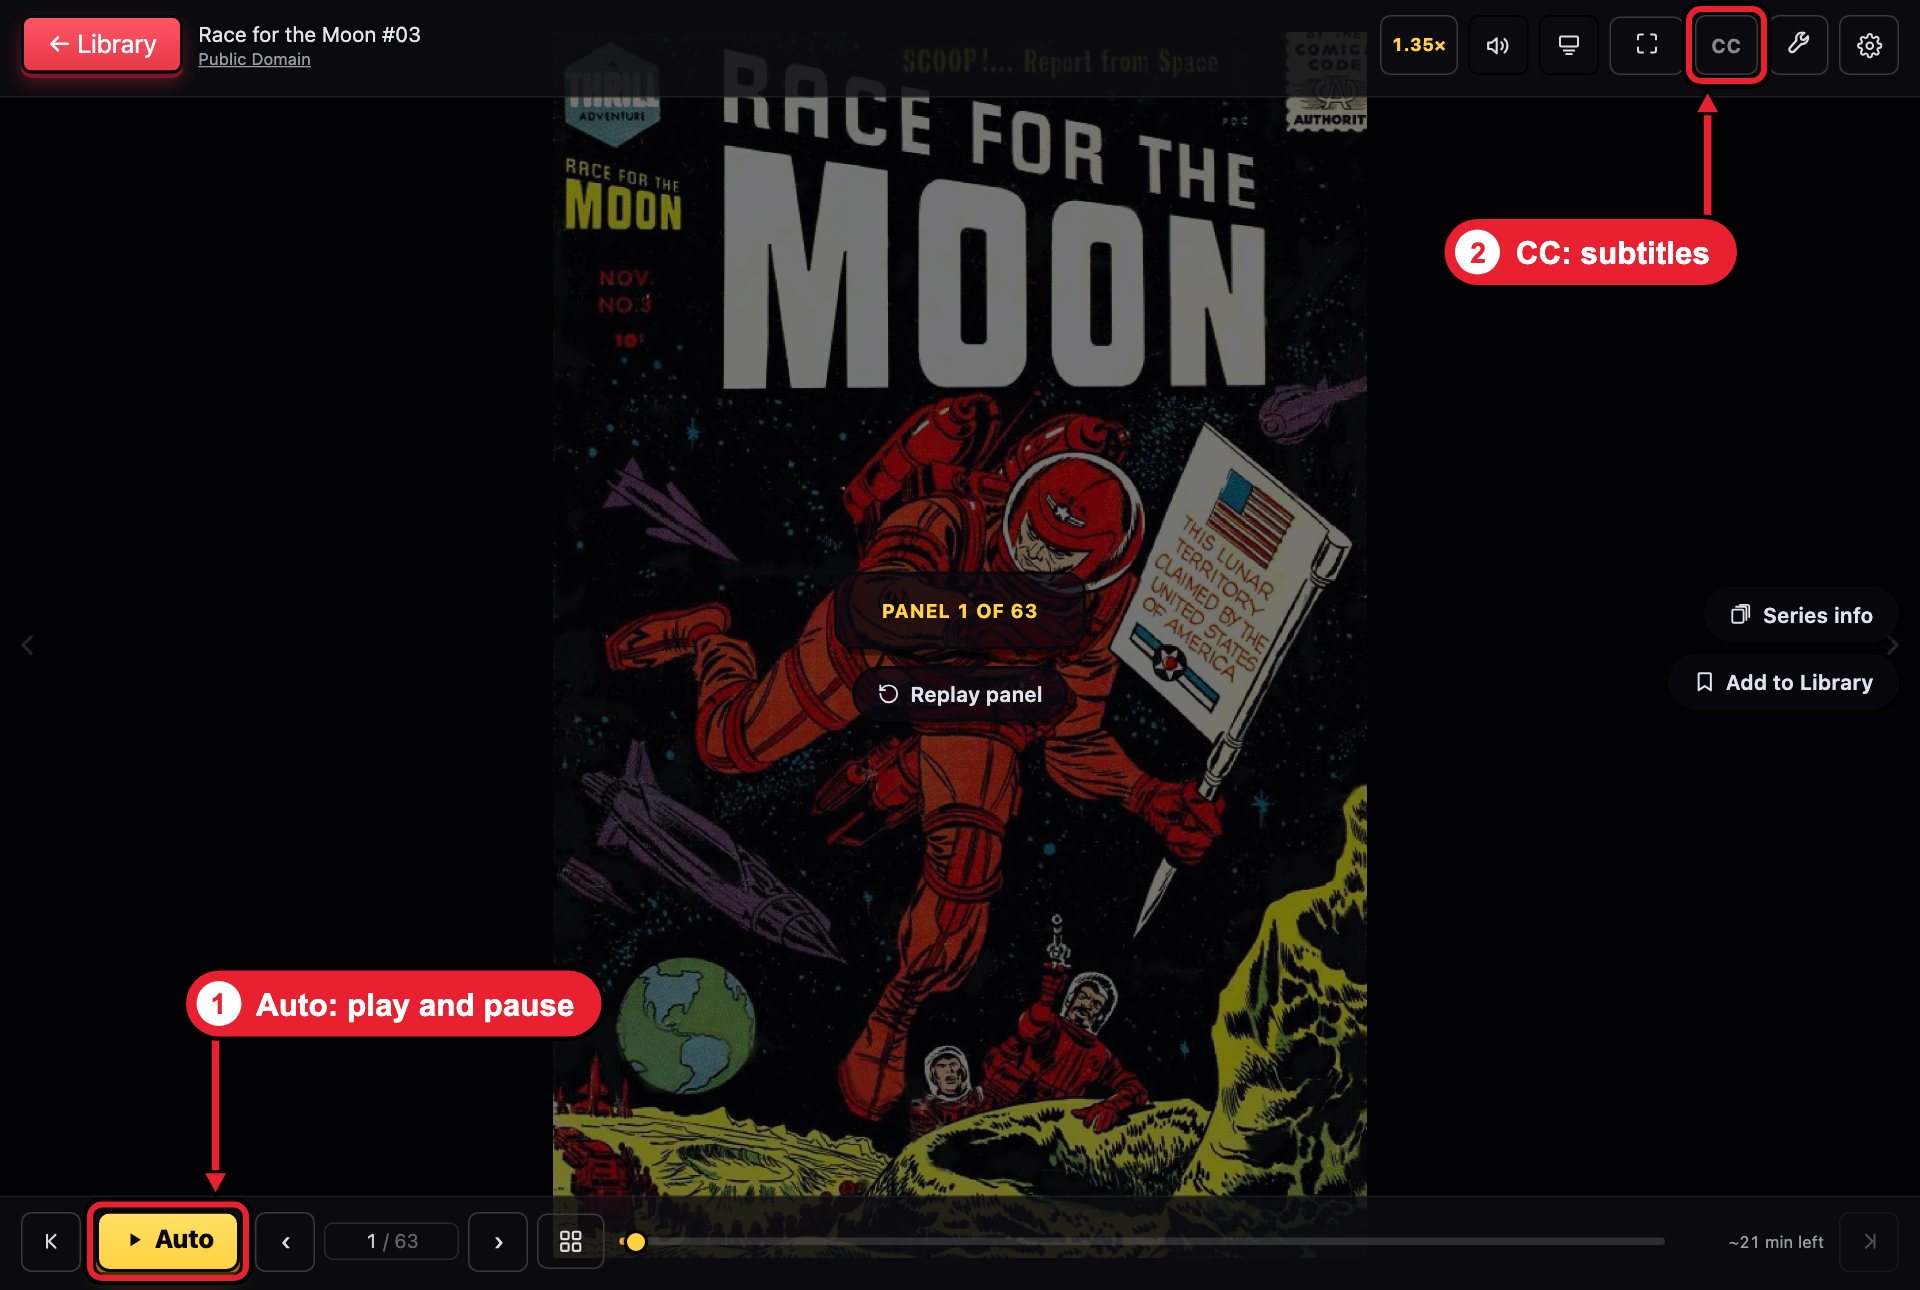
Click the cover to open the comic. It starts reading by itself. To bring up the buttons, click the middle of the screen.
- Auto, the yellow button at the bottom left, plays and pauses.
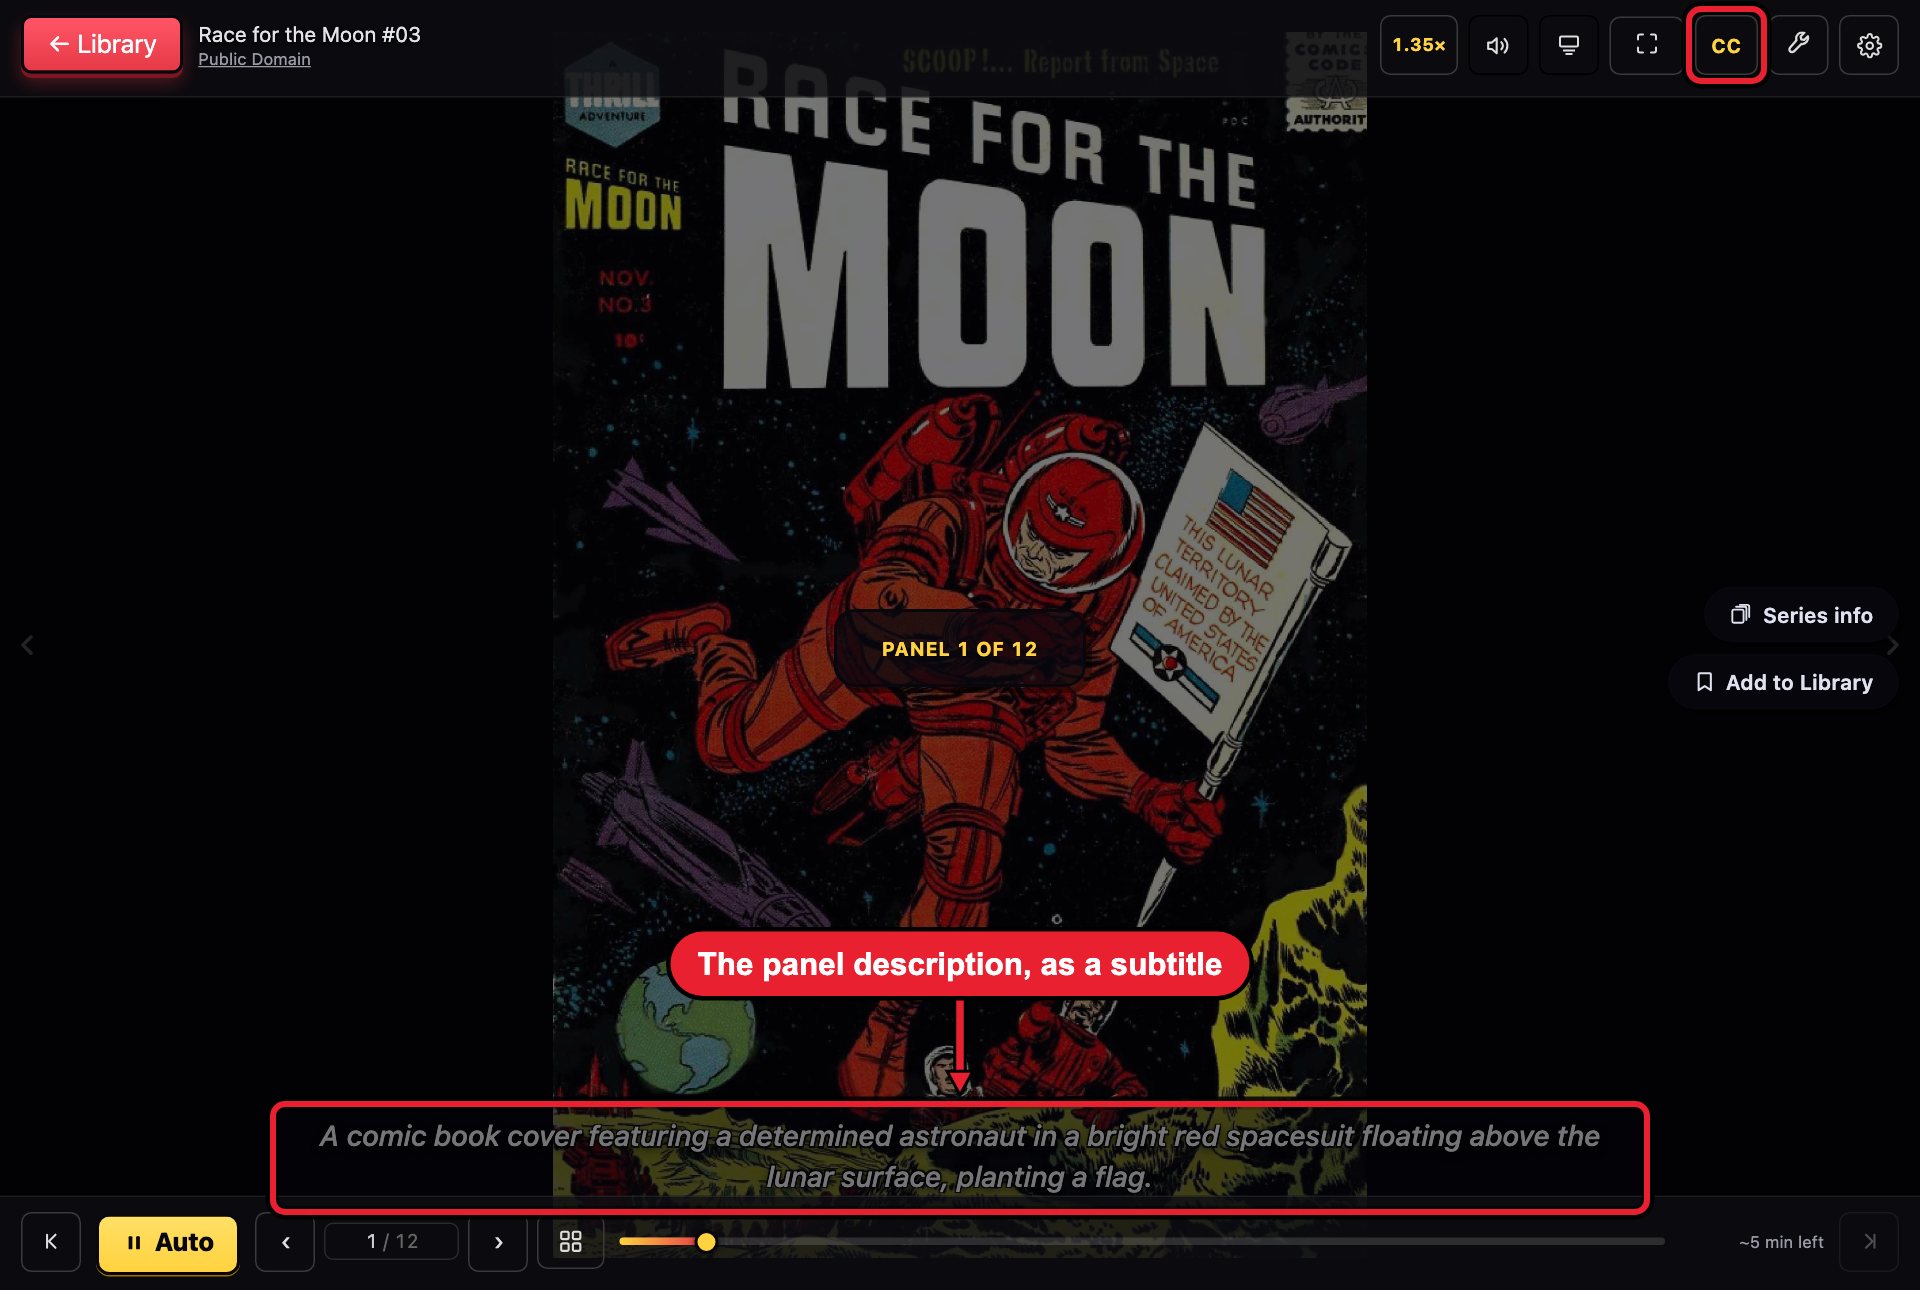
- CC, at the top right, turns on subtitles: every line of dialogue and every panel description, as text.
With a screen reader
- The play button is named Start autoplay, and Pause autoplay while it plays. CC is named Show subtitles.
- For everything else in the reader, see Using LiveComics with a screen reader or braille display.
Still stuck?
Email [email protected]. A person reads every message. For billing, refunds and account questions, see Support.